Top Ad 728x90

dimanche 18 octobre 2026

Got dracaena? 8 things you

by

Dracaenas, with their striking foliage and easy-going nature, are a popular choice for indoor plant enthusiasts. However, as the vibrant days of spring transition into the heat of summer, these beloved houseplants require a bit of extra attention to thrive. May is a crucial month for dracaena care, as the changes in light and temperature can lead to the dreaded brown tips if not addressed promptly. By taking the right steps now, you can ensure your dracaena remains lush and healthy throughout the warmer months. Here are eight essential tasks to tackle in May to keep your dracaena looking its best.

1. Check Light Levels Before Summer Sun Scorches Leaves Dracaenas prefer bright, indirect light, but the intensity of sunlight increases as summer approaches. It’s important to reassess the light conditions in your home to prevent leaf scorch. If your dracaena is near a south-facing window, consider moving it a few feet away or using a sheer curtain to diffuse the light. Ideally, dracaenas should receive about 10,000 to 20,000 lux of light, which is equivalent to a bright, shaded spot. Direct sunlight can cause the leaves to develop brown, crispy edges. If you notice this happening, it’s a sign to adjust the plant’s position immediately. Remember that dracaenas can also tolerate lower light conditions, but growth may slow down, and the plant may become leggy.

2. Refresh The Potting Mix To Boost Spring Growth Spring is a period of active growth for dracaenas, making it an ideal time to refresh the potting mix. Start by gently removing the plant from its pot and shaking off excess old soil. This is a good opportunity to check the roots for any signs of rot or disease. Use a well-draining potting mix, such as one part peat, one part pine bark, and one part perlite, to ensure adequate aeration and moisture retention. A fresh potting mix provides essential nutrients and encourages robust growth. If repotting isn’t necessary, top-dress the soil by removing the top 2 inches and replacing it with fresh mix. 3. Adjust Your Watering Routine To Prevent Crispy Brown Tips As temperatures rise, your dracaena’s water needs may change. Overwatering and underwatering can both lead to brown tips, so it’s crucial to find the right balance. Dracaenas prefer to dry out slightly between waterings, so check the top inch of soil; if it feels dry, it’s time to water.

Ensure your pot has proper drainage to prevent water from sitting at the bottom, which can lead to root rot. During warmer months, you might need to water your dracaena every 1-2 weeks, but always adjust based on your specific environment. 4. Raise Humidity The Easy Way (No Fancy Gadget Required) Dracaenas thrive in environments with moderate humidity levels. If you notice brown tips on your plant, it might be a sign that the air is too dry. An easy way to increase humidity is by placing a shallow tray filled with pebbles and water under the pot. As the water evaporates, it adds moisture to the air around the plant. Grouping houseplants together can also create a microenvironment with higher humidity. If you have a particularly dry home, consider misting your dracaena occasionally, but be careful not to overdo it, as excess moisture on leaves can lead to fungal issues. 5. Feed With A Gentle Fertilizer—But Don’t Overdo It As your dracaena enters its active growing season, it will benefit from a light feeding. Use a balanced, water-soluble fertilizer with an N-P-K ratio of around 3-1-2 or 10-10-10, diluted to half the recommended strength. Feed your dracaena once a month from spring through early fall.

Be cautious not to over-fertilize, as this can lead to salt buildup in the soil, which can cause root damage and leaf tip burn. Always water your plant before applying fertilizer to prevent root burn. 6. Trim Existing Brown Tips The Right Way So They Don’t Spread If you’ve noticed brown tips on your dracaena, it’s important to trim them properly to prevent further damage. Use clean, sharp scissors to cut off the brown portion of the leaf, following the natural shape of the leaf tip. Trimming prevents the brown area from spreading and gives your plant a healthier appearance. Always sterilize your scissors before and after trimming to avoid transferring any potential disease.

7. Inspect For Pests And Hidden Stress Signs You’re Missing Regularly checking your dracaena for pests is crucial, especially in spring when plants are more vulnerable. Look under the leaves and along the stems for common pests like spider mites, mealybugs, and scale insects. If you notice any, treat them promptly with insecticidal soap or neem oil.

Besides pests, watch for signs of stress such as yellowing leaves or slowed growth, which could indicate issues like overwatering or poor light conditions. Address these stress factors promptly to keep your dracaena healthy. 8. Decide If It’s Time To Repot Or Root-Prune Your Dracaena If your dracaena has outgrown its pot, May is a good time to consider repotting. Signs that it’s time to repot include roots growing out of the drainage holes or circling the pot. Choose a pot that is 1-2 inches larger in diameter to give the roots room to grow. If repotting isn’t an option, you can opt to root-prune your dracaena. Carefully remove the plant from its pot and trim back excess roots, then replant it in the same pot with fresh soil. This will encourage new growth and help maintain the plant’s size.

Vinegar: The Key to Whiter

by

Vinegar has been a household staple for centuries, commonly used in cooking and cleaning. However, its benefits extend far beyond these traditional roles. One of the lesser-known uses for  vinegar is its ability to revolutionize your laundry routine.

Imagine achieving whiter whites and softer  towels without resorting to harsh chemicals. Vinegar provides a natural and effective solution to these common laundry challenges.

You might wonder why you should consider such an unconventional method. This article will explain how a simple household item can significantly enhance the quality of your clothing and linens.

By the end, you’ll understand why  vinegar might be the secret ingredient missing from your  laundry routine.

How Vinegar Works to Whiten Whites and Soften Towels

Natural Bleaching Agent: Vinegar contains acetic acid, which helps break down dirt and stains on fabric. Unlike bleach, vinegar is much gentler, ensuring that your fabrics remain undamaged.

Fabric Softener Alternative: Vinegar acts as a natural fabric softener by breaking down detergent residues left in the fabric, which can make towels feel stiff.

Using vinegar, your towels will come out softer and fluffier. Odor Elimination: Vinegar effectively neutralizes odors. It removes any lingering smells in your laundry, ensuring that your whites and towels smell fresh and clean.

Color Brightening: While vinegar is particularly effective on white fabrics, it also helps maintain the brightness of colors by dissolving alkaline deposits left by detergents. How to Use Vinegar in Your Laundry

Mama served a plate of

by

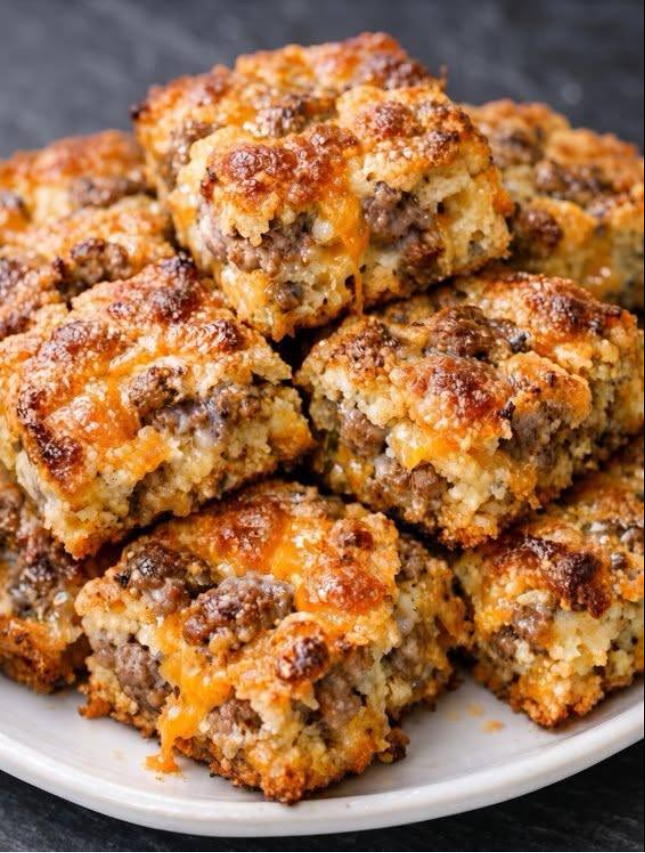
I have a serious soft spot for recipes that make you look like you spent way more time in the kitchen than you actually did. And these 3-Ingredient Cheesy Sausage Squares are exactly that kind of recipe!

With just sausage, cheddar cheese, and refrigerated crescent dough, you can make a warm, savory bake that’s perfect for breakfast, brunch, game day, potlucks, or those evenings when you need something delicious without a long ingredient list.

The sausage gets browned and savory, the cheese melts into all those little pockets of goodness, and the crescent dough bakes up golden and buttery around everything.

If you love easy recipes with minimal ingredients, be sure to subscribe by email so you can get more simple favorites delivered straight to your inbox.

What Are Cheesy Sausage Squares? Think of these as a cross between a sausage breakfast bake and a cheesy crescent pastry.

Instead of making individual sausage rolls, everything is layered into a baking dish and cut into squares after baking.

That makes them especially convenient when you’re feeding a crowd.

You don’t have to shape dozens of individual pastries.

You don’t need a complicated sauce.

And you certainly don’t need a long grocery list.

Just three main ingredients come together to make something warm, cheesy, meaty, and incredibly satisfying.

Why You’ll Love This Recipe There are so many reasons to keep this one handy.

Only 3 main ingredients Easy to prepare Great for breakfast or brunch Perfect for parties and potlucks Kid-friendly Cheesy and savory Easy to customize Can be prepared ahead Delicious warm or reheated And because the ingredients are so simple, this is one of those recipes you can memorize.

Once you’ve made it a couple of times, you’ll probably be able to throw it together without even looking at the recipe.

What Do Cheesy Sausage Squares Taste Like? The flavor is pure comfort food.

The sausage brings plenty of savory, meaty flavor, while the cheddar adds a rich, salty cheesiness.

The crescent dough provides a buttery, slightly sweet contrast that ties everything together.

Every bite gives you a little bit of crispy golden pastry, seasoned sausage, and gooey melted cheese.

But simple doesn’t mean boring!

Sometimes those are the recipes everyone reaches for first.

Ingredients You’ll Need The 3 Ingredients:

1 pound breakfast sausage 2 cups shredded sharp cheddar cheese 2 packages refrigerated crescent roll dough That’s it!

No special ingredients hiding at the back of the pantry.

The sausage and cheddar already bring plenty of flavor.

Kitchen Tools You’ll Need You’ll need:

Large skillet Wooden spoon or spatula 9×13-inch baking dish Parchment paper or cooking spray Cutting board Sharp knife Mixing spoon A pastry brush is optional if you want to lightly brush the dough with melted butter before baking.

How to Make 3-Ingredient Cheesy Sausage Squares Step 1: Cook the Sausage Preheat your oven to 375°F (190°C).

Place the breakfast sausage in a large skillet over medium heat.

Cook, breaking it apart with a wooden spoon, until browned and cooked through.

Don’t leave the sausage in large chunks.

You want small, crumbled pieces that can spread evenly throughout the casserole.

Once cooked, drain off excess grease.

Set the sausage aside for a few minutes so it isn’t piping hot when you assemble the layers.

Step 2: Prepare the Crescent Dough Lightly grease a 9×13-inch baking dish.

Unroll one package of crescent roll dough.

Press the dough into the bottom of the baking dish, gently working it toward the edges.

Pinch together any perforations so you have one reasonably solid layer.

Don’t worry if it isn’t absolutely perfect.

The dough will puff and bake together as it cooks.

Step 3: Add the Sausage Spread the cooked sausage evenly over the crescent dough.

Try to distribute it all the way toward the corners.

You don’t want one giant sausage pile in the middle and bare pastry around the edges!

Step 4: Add the Cheese Sprinkle the shredded cheddar evenly over the sausage.

This is a cheesy sausage casserole, after all!

Sharp cheddar works particularly well because its stronger flavor stands up to the sausage.

Step 5: Add the Top Layer Unroll the second package of crescent dough.

Carefully place it over the cheese layer.

If the dough tears a little, don’t panic.

Simply patch it together with your fingers.

The goal is to create an even top layer rather than a perfectly smooth pastry sheet.

Step 6: Bake Place the baking dish in the preheated oven.

Bake for approximately 25–30 minutes, or until the crescent dough is puffed and deeply golden and the center is hot.

If the top starts browning too quickly before the center is fully cooked, loosely cover the dish with foil for the remainder of the baking time.

Step 7: Rest Before Cutting This step is important!

Let the sausage squares rest for about 10 minutes after removing them from the oven.

The cheese will be extremely hot when the casserole first comes out.

Resting also makes the squares easier to cut without everything sliding apart.

Use a sharp knife to cut the casserole into squares.

A Little Tip About the Dough Because refrigerated crescent dough comes in perforated triangles, you may need to gently press the seams together when forming each layer.

Don’t spend forever trying to make it perfect.

Once baked, the dough will puff and bind together.

If a small tear appears while you’re moving the dough into the pan, simply pinch it closed.

What Kind of Sausage Should You Use? Regular breakfast sausage is perfect for this recipe.

Mild breakfast sausage Hot breakfast sausage Country sausage Turkey breakfast sausage Your favorite bulk sausage If you use sausage links rather than bulk sausage, remove the casings before cooking.

Want It Spicy? Use hot sausage.

That’s probably the easiest way to add heat without adding another ingredient.

For even more spice, you can serve the finished squares with hot sauce or sliced jalapeños.

Can You Use a Different Cheese? Absolutely.

Cheddar is my favorite because it gives you that classic sharp, cheesy flavor, but you have options.

Colby Jack Monterey Jack Pepper Jack Mexican-style cheese blend Mild cheddar Sharp cheddar Smoked cheddar Pepper Jack is especially good if you like a little kick.

Easy Additions Technically, adding anything else means you’re moving beyond the three-ingredient version.

If you have a few extra ingredients available, you can turn these into a completely different breakfast bake.

Diced Green Onions Sprinkle chopped green onions over the sausage before adding the cheese.

Diced Jalapeños Fresh or pickled jalapeños add heat and a little brightness.

Cooked Bacon Crispy crumbled bacon makes these even more indulgent.

Scrambled Eggs For a heartier breakfast casserole, add a layer of cooked scrambled eggs between the sausage and cheese.

What to Serve With Sausage Squares These are filling enough to serve on their own, but a few simple sides can turn them into a complete meal.

Fresh Fruit A bowl of berries, melon, or sliced oranges provides a fresh contrast to the rich sausage and cheese.

Scrambled Eggs If you’re serving these for breakfast, eggs make an easy pairing.

Hash Browns For the ultimate breakfast spread, add crispy hash browns or breakfast potatoes.

Green Salad For lunch or dinner, a simple green salad can balance the richness of the pastry.

Hot Sauce A few drops of your favorite hot sauce can wake everything up.

Tips for Making the Best Cheesy Sausage Squares Drain the Sausage Well Too much grease can make the bottom layer of dough soggy.

After browning the sausage, drain off excess fat before assembling.

Shred Your Own Cheese Freshly shredded cheddar generally melts beautifully.

Pre-shredded cheese can still work, but freshly grated cheese is often worth the extra minute.

Don’t Overfill the Dough Keep the sausage and cheese layers relatively even.

A giant mound in the center can make the top dough difficult to spread and may lead to uneven baking.

Let the Squares Rest Don’t cut immediately after taking the casserole out of the oven.

You’ll get much cleaner squares.

Watch the Top Crescent dough can brown quickly.

If the top is golden before the center is fully heated, loosely cover it with foil.

You can cook the sausage ahead of time and refrigerate it until you’re ready to assemble the casserole.

For best results, assemble the casserole relatively close to baking time so the crescent dough doesn’t sit in the moist sausage mixture for too long.

If you assemble it ahead, keep it refrigerated and bake it until the center is thoroughly hot and the dough is fully cooked.

How to Store Leftovers Allow leftover sausage squares to cool appropriately, then transfer them to an airtight container.

Refrigerate for up to 3–4 days.

Reheat individual portions in the microwave for convenience, or use an oven or toaster oven if you want the pastry to regain some crispness.

Can You Freeze Cheesy Sausage Squares? Yes.

Let the baked squares cool completely.

Cut them into individual portions and wrap them well before placing them in a freezer-safe container or bag.

For best quality, use within about 2 months.

Thaw overnight in the refrigerator and reheat until hot throughout.

The crescent dough may not be quite as crisp as it was fresh from the oven, but the squares will still make a convenient make-ahead breakfast.

Frequently Asked Questions Can I use crescent sheets instead of crescent rolls? Yes. Crescent sheets are actually very convenient because you don’t have to press the perforated seams together.

Can I use hot sausage? Absolutely. Hot breakfast sausage is an easy way to give the squares a spicy flavor.

Can I use mild cheddar? Yes. Mild cheddar works perfectly, although sharp cheddar provides a stronger cheese flavor.

Why are my sausage squares soggy on the bottom? Excess grease from the sausage is one possible reason. Make sure the sausage is thoroughly drained before assembling the casserole.

The dough also needs to be fully baked before removing the casserole from the oven.

Can I add eggs? Yes, but eggs aren’t part of the basic three-ingredient version. Cook the eggs before adding them to the casserole rather than pouring raw eggs directly over the dough.

Can I make these without pork sausage? Yes. Turkey or chicken breakfast sausage can work as a substitute, although the flavor and fat content will be different.

How do I get clean square slices? Let the casserole rest for about 10 minutes after baking, then use a sharp knife and cut straight down rather than dragging the knife through the layers.

Recipe at a Glance Prep time: 15 minutes Cook time: 25–30 minutes Resting time: 10 minutes Total time: About 50–55 minutes Servings: 12 squares Course: Breakfast, brunch, appetizer Cuisine: American Method: Oven-baked casserole

Approximate Nutrition Nutrition will vary depending on the sausage, crescent dough, cheese, and serving size you use.

A rough estimate for one of 12 squares is:

Calories: 280–340 Protein: 12–16g Fat: 20–25g Carbohydrates: 10–15g For the most accurate nutrition information, calculate the recipe using the exact brands and quantities you purchase.

Final Thoughts These 3-Ingredient Cheesy Sausage Squares are exactly the kind of recipe I love having around.

And they don’t require a complicated shopping list.

The combination of savory sausage, sharp cheddar, and golden crescent dough is simple, but somehow it tastes like something you’d happily serve to a whole table of hungry guests.

Or keep a batch in the refrigerator for easy reheated breakfasts during the week.

And if you want to change things up, try hot sausage, Pepper Jack cheese, jalapeños, or crispy bacon.

Three ingredients are all you need to get started—but there’s plenty of room to make them your own!

If you make these sausage squares, leave a review and share a photo on Pinterest. I’d love to see how golden and cheesy yours turn out!

And if you’re looking for more easy breakfast recipes, keep an eye out for simple egg bakes, cheesy breakfast casseroles, and sausage-filled favorites. Those are the recipes that always seem to disappear first!


We're having lobster for dinner

by

If you’ve ever cracked open a freshly cooked lobster and discovered a soft, green substance tucked inside its body, you may have paused before taking another bite. Many first-time lobster eaters assume something is wrong with the seafood, while seasoned seafood lovers often debate whether it’s a delicacy or something that should be discarded. Its unusual appearance has sparked countless questions around dinner tables and seafood markets alike.

The truth is that this mysterious green material has a name, a purpose, and an interesting story. Understanding what it is can help you decide whether you want to enjoy it, remove it, or simply appreciate another fascinating detail about one of the ocean’s most popular shellfish.

What Is the Green Substance Inside a Lobster? The green material found inside a lobster is commonly called the tomalley. It serves as both the lobster’s liver and pancreas, performing many of the same essential functions these organs carry out in other animals.

Tomalley helps digest food, stores nutrients, and filters substances from the lobster’s body. Because of its role, it naturally has a soft, creamy texture and a distinctive green color that can vary depending on the lobster’s diet and environment.

Why Is It Green? The color comes from pigments found in the lobster’s food, which includes algae, seaweed, small fish, mollusks, and other marine organisms.

Depending on what the lobster has been eating, the tomalley may appear:

Bright green Olive green Yellow-green Brownish green These color variations are completely normal and don’t necessarily indicate freshness or quality.

Is Tomalley Safe to Eat? Many people enjoy eating tomalley and describe its flavor as rich, buttery, and intensely “ocean-like.” It has long been considered a delicacy in many coastal communities and is sometimes mixed into sauces, seafood spreads, soups, or lobster dishes to add extra depth of flavor.

However, there is an important consideration.

Would You Eat Buttermilk Biscuits

by

There are some breakfasts that look simple but somehow feel incredibly satisfying.

A generous spoonful of creamy sausage gravy.

Savory pieces of browned sausage scattered throughout.

Put all of that together, and you have one of the most recognizable comfort-food combinations in Southern American cooking: buttermilk biscuits with sausage gravy.

The photograph above makes the question very simple:

For people who grew up eating biscuits and gravy, the answer might be immediate. For others, the combination may look completely unfamiliar. Either way, it’s the kind of plate that gets people talking because it is rich, hearty, filling, and unapologetically comforting.

The beauty of this meal isn’t complicated presentation. There are no delicate decorations or expensive ingredients. It’s about warm homemade biscuits covered in a creamy, peppery gravy packed with sausage.

And when the biscuits are freshly baked, the contrast between their golden crust and soft interior makes the whole dish even more tempting.

At its simplest, biscuits and gravy consists of two main components.

The first is the buttermilk biscuit.

These are tender, layered quick breads traditionally made with flour, a leavening agent, fat such as butter or shortening, and buttermilk.

The second component is sausage gravy.

This is typically made by browning ground breakfast sausage and then using the flavorful fat left in the pan to create a roux. Milk is gradually added, creating a thick, creamy sauce. Black pepper and other seasonings are usually added for flavor.

The finished gravy is spooned generously over warm biscuits.

The ingredient list can be surprisingly short.

But when those ingredients are prepared properly, the result is anything but boring.

It is one of the

by

If you’re referring to oregano as “the most powerful plant,” it’s easy to see why this unassuming herb has earned such a reputation. While oregano is often associated with its culinary uses—like flavoring pizzas and Mediterranean dishes—it also boasts impressive health benefits that have been recognized for centuries in traditional medicine.

Let’s explore why oregano stands out as one of the most powerful plants in the world.

Why Oregano is Considered Powerful

Oregano (Origanum vulgare) contains two key active compounds, carvacrol and thymol, which are responsible for its potent medicinal properties. These natural agents provide a wide range of  health benefits, making oregano a true powerhouse:

Antibacterial Properties Oregano oil has been shown to combat harmful bacteria, including strains that are resistant to antibiotics. This makes it a valuable natural remedy for  infections and bacterial overgrowth.

Antiviral Activity Research suggests that oregano can help fight viral infections, potentially reducing the severity and duration of illnesses like colds and flu. Antifungal Effects

Oregano is effective against fungal infections, such as candida (yeast overgrowth), making it a popular choice for promoting gut health and treating skin conditions like athlete’s foot.

Anti-inflammatory Action The compounds in oregano help reduce inflammation, which can alleviate symptoms of chronic conditions like arthritis and support overall immune function. Rich in Antioxidants

Oregano is packed with antioxidants that protect your cells from damage caused by free radicals, reducing the risk of chronic diseases and supporting longevity. Health Benefits of Oregano

Digestive Support: Oregano oil can restore gut balance by promoting healthy bacteria and combating parasites or harmful microbes. Immune Boosting: Its antibacterial and antiviral properties make it a natural ally for strengthening the immune system.

Respiratory Health: Oregano can help clear congestion and ease symptoms of respiratory infections. Skin Health: Applied topically (diluted), oregano oil may help heal wounds, reduce acne, and soothe irritation.

Southern Collard Greens with Smoked

by

Collard greens are one of my favorite soul food side dishes.  This is an easy but time consuming recipe, but it’s definitely worth the trouble.  Enjoy!

Pick an Ice Cream Cone

by

What Your Ice Cream Choice Says About Your Inner Child Remember when you were a kid and the most difficult decision of your day was choosing an ice cream flavor? You would stand in front of the brightly lit glass case, pressing your nose against the cool window, completely mesmerized by the colors. Life was beautifully simple back then.

As adults, we often forget to listen to that little version of ourselves. We get caught up in deadlines, bills, and responsibilities. But today, we are going to take a sweet little detour.

Take a quick look at the image above. Don’t overthink it—just trust your gut and pick the ice cream cone that makes your mouth water instantly.

Have you made your choice? Let’s find out what your favorite treat says about you and, more importantly, what your inner child is secretly wishing for!

A. Vanilla: The Classic Soul If you reached straight for the classic Vanilla, you are someone who deeply values peace, simplicity, and comfort.

What it says about you: You don’t need fancy things to be happy. You find joy in a warm cup of coffee, a good book, or a quiet walk in the park. People love being around you because you are reliable, grounding, and steady like a rock.

What your inner child needs: Your inner child is begging for a break from the chaos. You have been working so hard to keep everything in order. It’s time to unplug your phone, turn off notifications, and spend a whole afternoon doing absolutely nothing without feeling guilty about it.

B. Chocolate Caramel: The Bold Dreamer

For Complete Cooking STEPS Please Head On Over To Next Page Or Open button (>) and don’t forget to SHARE with your Facebook friends

7 Mistakes Everyone Makes with

by

A washing machine makes your life incredibly easier – provided you treat it and your laundry correctly. However, many common everyday habits can damage your clothes over time or shorten the life of the appliance

Here are the 7 most common mistakes and how to easily avoid them:

Overdosing on detergent Mistake: “More is better” – using more detergent results in cleaner laundry. Reality: Too much detergent creates excessive suds. This builds up on fabrics (making them stiff) and leaves a musty residue in the washing machine hoses.

Tip: Strictly follow the dosage instructions on the packaging and adjust them to the water hardness in your area.

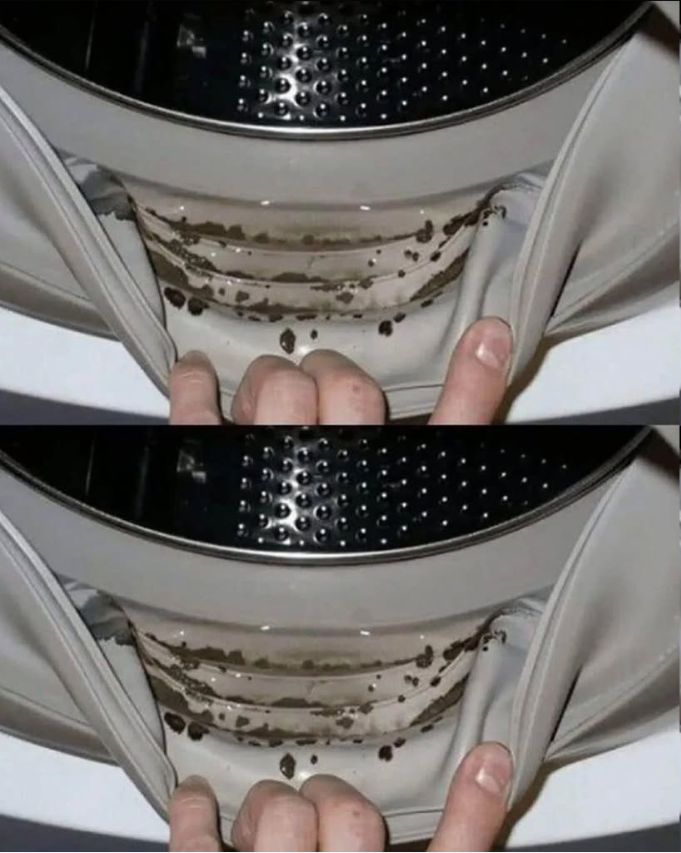
Closing the washing machine door after washing Mistake: The door and detergent dispenser are closed tightly as soon as the laundry is removed. Reality: A damp, dark drum creates the ideal environment for bacteria, mold and unpleasant odors.

Tip: After each wash, leave the door and detergent dispenser slightly ajar to allow the washing machine to dry.

Only wash at low temperatures Mistake: For environmental and energy reasons, people only wash at 20°C or 30°C.

Reality: While low temperatures save energy and protect fabrics, they do not destroy bacteria and grease deposits in the washing machine. Over time, the washing machine will start to smell.

Tip: Wash white laundry or towels/bed linen at 60°C at least once a month (ideally with an intensive powder detergent) to disinfect the drum.

Leave zippers open and buttons closed Mistake: Pants and jackets simply fit into the drum as they were taken off.

Reality: Open zippers act like tiny saws and damage delicate fabrics. Closed buttons, on the other hand, are subjected to a lot of tension during the spin cycle and can tear. Part 2 of 2 Tip: Always close zippers, but leave buttons on shirts and bed linens open.

Using fabric softener on the wrong fabrics Mistake: Fabric softener is added to every wash for the scent.

Reality: Fabric softener coats fibers with a thin film. In sportswear, it clogs breathable membranes; in towels, it drastically reduces absorbency; and elastane (e.g. in jeans or leggings) loses its elasticity.

Tip: Use fabric softener sparingly and avoid it altogether on sportswear, microfiber, towels, and wool. Alternatively, a little white vinegar in the fabric softener compartment can help.

Overfilling the drum Mistake: The laundry is packed as tightly as possible in the washing machine to save on wash cycles.

Reality: The water and detergent can no longer circulate evenly. The laundry is not washed properly and the washer’s shock absorbers and bearings wear out extremely quickly.

Tip: As a rule, there should always be a distance of about the width of your hand between the laundry and the top of the drum.

Never clean the filter and seals Mistake: The washing machine is considered a self-cleaning appliance.

Reality: Hair, coins and tissue paper are collected in the lint filter (foreign object trap). Wet sludge accumulates in the rubber door seal.

Tip: Wipe the rubber seal regularly after washing and clean the lint filter every 2 to 3 months.

The material was prepared by the editorial team using artificial intelligence tools. All information was checked and edited before publication.

Marouane Majouri

by

Have you ever found yourself standing in front of the fridge at 11 PM, telling yourself, “I’m not really hungry… I just want something”? Late-night cravings are funny like that. They often have less to do with hunger and more to do with our mood, energy level, and personality.

This little quiz isn’t meant to be a scientific diagnosis, but it’s based on a simple idea that psychologists and behavior researchers often talk about: the choices we make when we’re tired and less filtered tend to reveal what we naturally seek—comfort, excitement, stimulation, or rest.

So, be honest. If it’s 11 PM and you can choose only one, what are you reaching for: Pizza, Cookies, Coffee, or Sleep?

If pizza is your late-night pick, there’s a good chance you’re someone who enjoys experiences more than routines.

Pizza is rarely a quiet, careful choice. It’s the food of movie nights, road trips, game nights, and “let’s do something fun” moments. People who choose it often like variety, spontaneity, and being around others.

You’re probably the friend who says, “Why not?” a little more often than everyone else.

That doesn’t mean you’re reckless. It just means you tend to value memories over perfection. Research on personality and food preferences has found that people who enjoy bold, flavorful foods are often more open to new experiences. So if pizza is calling your name, your brain may be craving excitement and connection, not just melted cheese.

Cookies — The Comfort Seeker Choosing cookies at 11 PM is a completely different vibe.

For Complete Cooking STEPS Please Head On Over To Next Page Or Open button (>) and don’t forget to SHARE with your Facebook friends

While tidying up our grandparents

by

There is something wonderfully simple about a well-made soft-boiled egg. The outside is ordinary, but once the shell is opened, you find a warm, delicate egg white surrounding a rich, golden yolk. Add a few pieces of toast, some fresh fruit, or a cup of coffee, and you have a breakfast that feels both comforting and satisfying.

Soft-boiled eggs don’t require complicated ingredients or advanced cooking techniques. In many cases, the biggest challenge is simply getting the timing right.

However, there is another small problem that often gets overlooked: how to open the egg neatly once it is cooked.

Breaking the shell with a spoon can work, but it does not always produce the clean result you want. A little too much force can send shell fragments onto the plate, while too little force may leave you tapping away at the shell without making a useful opening.

That is where a simple kitchen accessory known as an egg topper can be useful.

It is not a complicated appliance or an essential piece of kitchen equipment. Instead, it is a small tool designed specifically to help create a controlled opening at the top of a cooked egg.

For people who enjoy soft-boiled eggs regularly, that small difference can make breakfast a little easier and more enjoyable.

Why Opening a Soft-Boiled Egg Can Be Tricky Cracking a raw egg is usually straightforward because the contents are going into a bowl or pan. Appearance is rarely important.

A soft-boiled egg is different.

The goal is generally to remove only the upper part of the shell while keeping the rest of the egg intact. Ideally, the egg white should remain in place and the yolk should stay undisturbed.

Using a spoon or another utensil requires a certain amount of judgment. You need to decide where to tap and how much pressure to use.

If you tap too gently, the shell may barely crack. If you strike too firmly, the shell can break into several pieces.

Even when the egg itself has been cooked perfectly, an awkward opening can make the final presentation less appealing.

This is especially noticeable when the egg is served in an egg cup. A clean opening allows you to see the yolk immediately and makes it easier to eat with a small spoon or dip pieces of toast into it.

An egg topper addresses this particular part of the process.

What Is an Egg Topper? An egg topper is a compact kitchen tool designed to remove the upper portion of a boiled egg shell.

Different models have different shapes and mechanisms, but many feature a small cup or bell-shaped section that sits over the top of the egg. Some designs include a movable handle or weight that creates a controlled impact when released.

The basic idea is simple: instead of repeatedly tapping the shell and hoping it breaks along the desired area, the tool is designed to help create a more defined opening.

Because the tool has a specific purpose, it can make the process feel more controlled than using an ordinary spoon or knife.

Of course, results can vary depending on the particular design, egg size, shell strength, and how the tool is used. It is best thought of as a convenience rather than a guarantee of a perfect result every time.

How to Use One Most egg toppers are relatively simple to operate.

First, cook your egg according to your preferred method. Once it has reached the desired consistency, place it upright in a suitable egg cup.

Next, position the topper over the narrow end or top of the egg, depending on the design of the tool.

If your model uses a movable mechanism, follow the manufacturer’s instructions to position or release it. The mechanism creates an impact around the shell, helping to establish a line where the top can be removed.

Once the shell has separated, carefully lift away the top portion.

The exact procedure differs from one product to another, so checking the instructions supplied with the tool is a good idea, particularly when using it for the first time.

The objective is straightforward: create an opening large enough to enjoy the egg without unnecessarily disturbing the rest of the shell.

Why the Design Can Be Useful The appeal of an egg topper is largely its simplicity.

Instead of using a sharp kitchen knife or repeatedly tapping the shell with a spoon, you are using an accessory designed for this particular job.

That can provide several practical advantages.

A More Controlled Opening A dedicated topper can make it easier to create a defined opening at the top of the egg.

The result may be more visually appealing than an irregular crack, particularly when the egg is being served directly in its shell.

Less Shell Around the Plate One of the minor annoyances of opening an egg manually is dealing with small shell fragments.

A controlled cracking method can reduce the amount of loose shell that ends up on the plate or table, although careful handling is still important.

Easier Presentation If you enjoy preparing breakfast for guests or simply like attractive food presentation, the appearance of the egg can make a difference.

A neatly opened shell creates a clean surface around the yolk and makes the egg look more deliberate when served in an egg cup.

Convenient for Regular Use If soft-boiled eggs are already part of your breakfast routine, a small tool that simplifies one repetitive step can be worthwhile.

For someone who eats them only once or twice a year, however, an egg topper may not be necessary.

That distinction is important: kitchen gadgets are most useful when they solve a problem you actually encounter regularly.

It Doesn’t Replace Good Cooking Technique An egg topper can help with opening the shell, but it cannot fix an egg that has been overcooked or undercooked.

Getting the desired consistency still depends on factors such as:

Egg size Starting temperature Water temperature Cooking time Altitude Personal preference For example, someone who prefers a very runny yolk may use a shorter cooking time than someone who wants the yolk to be slightly more set.

Because eggs vary, cooking can involve a little experimentation. Once you find a method that consistently produces the texture you like, the egg topper can simply make the serving step easier.

A Useful Addition for People Who Enjoy Simple Kitchen Tools Modern kitchens are full of gadgets designed to perform increasingly specific tasks. Some are genuinely useful, while others spend most of their lives at the back of a cupboard.

The egg topper falls into an interesting category because its usefulness depends almost entirely on how often you prepare soft-boiled eggs.

If you enjoy them frequently, its compact design may make sense. If you rarely eat them, a regular spoon may be perfectly adequate.

That is one of the advantages of a small tool like this: it does not require electricity, batteries, complicated settings, or a large amount of storage space.

It is designed to perform one simple task.

A Small Detail That Can Improve Breakfast There is also something enjoyable about turning a routine meal into a small ritual.

Breakfast does not always need to be elaborate. Sometimes, a few simple ingredients prepared with care can make the start of the day feel more pleasant.

A soft-boiled egg served in a traditional egg cup, accompanied by toast and a warm drink, has a certain charm. The act of opening the shell neatly can become part of that experience.

An egg topper does not fundamentally change the meal. It simply removes some of the uncertainty from one small step.

And that is often where useful kitchen tools succeed: not by completely changing how we cook, but by making an ordinary task slightly more convenient.

Is an Egg Topper Worth Having? The answer depends on your habits.

An egg topper may be worth considering if you:

Regularly prepare soft-boiled or similar eggs. Prefer neat and attractive food presentation. Find it difficult to open eggs without shell fragments. Enjoy specialized but simple kitchen accessories. Want a compact tool that serves a specific purpose. On the other hand, if you only occasionally prepare soft-boiled eggs, you may not notice enough of a difference to justify adding another item to your kitchen.

There is no need to own a gadget simply because it exists. The best kitchen tools are the ones that genuinely fit your cooking habits.

Cleaning and Storage One benefit of many egg toppers is their relatively straightforward maintenance.

Models made from stainless steel or other washable materials can generally be cleaned after use according to the manufacturer’s care instructions.

Marouane Majouri

by

The thimble may seem like a small and simple sewing tool, but its history goes back thousands of years. Early finger protectors were made from materials such as bone and stone and helped people push needles through tough leather and hides. By around 100 AD, the Romans were using bronze thimbles, while similar examples appeared in ancient China and other civilizations. These early versions were mainly practical, with little attention given to decoration.

During the Middle Ages, thimbles became increasingly common across Europe. By the 14th century, tailors, embroiderers, and leather workers commonly used brass or bronze versions to protect their fingers during repetitive stitching. In the 15th and 16th centuries, Nuremberg became a major center of thimble production. Better metalworking techniques allowed craftsmen to make stronger, smoother, and more consistent designs.

By the 17th century, thimble production had expanded into countries such as England and the Netherlands. As manufacturing

Doctors Issue a Serious Warning

by

The Hidden Dangers of America’s Favorite Condiment

Advertisement Ketchup, a staple on American dinner tables, is often seen as a harmless, flavorful companion to burgers, fries, and hot dogs. But health experts are now raising serious concerns about its impact on long-term health—especially when you consider what’s really inside that iconic bottle.

The Truth Behind Tomato Concentrate

Although many believe ketchup is made from fresh, ripe tomatoes, most commercial brands—including Heinz—use tomato concentrate. This highly processed form strips away nutrients like fiber, vitamins, and antioxidants, leaving a product that shares little with its fresh tomato origins.

What remains is a sugary, low-nutrient paste that adds flavor but not much else to your plate.

A Closer Look at Processed Ingredients

In addition to tomato concentrate, ketchup typically contains a range of processed additives:

Distilled Vinegar – Adds acidity and acts as a preservative

High-Fructose Corn Syrup (HFCS) – A sweetener linked to obesity and heart disease

Salt – Used in excess for taste enhancement

Artificial Flavorings – Chemical compounds that mimic natural tastes

These ingredients extend shelf life and taste but come with serious health concerns like insulin resistance, weight gain, and elevated blood pressure.

Perhaps the most shocking aspect of ketchup is its high sugar content. Though considered savory, ketchup is essentially a sugary sauce in disguise.

A standard 1.3-liter Heinz bottle contains 33 tablespoons of sugar—that’s more than 2 cups!  Just 1 tablespoon of ketchup = 4 grams of sugar, about the same as 1 teaspoon of table sugar.

For those who use ketchup liberally, the sugar intake adds up fast—potentially contributing to:

Health professionals urge consumers to limit ketchup consumption, particularly because of its:

Excessive Sugar – Just 3 tablespoons can exceed daily recommended limits by the American Heart Association.

What's the point of that

by

Have you ever walked into a public restroom and noticed that the toilet seat looks different from the one you have at home? Instead of being a complete oval, many public toilet seats have an open-front or U-shaped design with a noticeable gap at the front. While it may seem like an unusual design choice, that small opening actually serves several important purposes related to hygiene, comfort, accessibility, and maintenance.

This distinctive shape has been used in public facilities for decades and isn’t just a random style preference. Let’s explore why so many public restrooms use U-shaped toilet seats and how this simple design improves the experience for everyone.

A Design Focused on Better Hygiene One of the primary reasons for the open-front toilet seat is improved sanitation. Public restrooms receive heavy daily traffic, making cleanliness a constant challenge. The gap at the front reduces the amount of surface that comes into contact with users, helping minimize the spread of bacteria and germs.

The opening also makes it easier for people to avoid touching the seat with their bodies unnecessarily. Since fewer areas come into direct contact with users, keeping the seat sanitary becomes much simpler.

In environments where hundreds or even thousands of people use the same restroom every day, every small improvement in hygiene can make a significant difference.

Easier to Clean and Maintain Anyone responsible for maintaining public restrooms knows that efficiency matters. Cleaning crews often have limited time to sanitize large numbers of toilets throughout the day.

The U-shaped design offers several maintenance advantages:

Fewer surfaces that require detailed cleaning. Easier access to the front area of the bowl. Faster wiping and disinfecting. Reduced buildup of dirt and moisture around the seat. Because janitorial staff can clean these seats more quickly, restrooms are easier to keep in good condition even during busy periods.

Helps Reduce Accidental Contact Another practical benefit is that the open-front design provides extra space, reducing the likelihood of accidental contact between the user’s body and the toilet seat.

This added clearance can make using the toilet feel more comfortable, especially in public settings where people naturally prefer to avoid touching shared surfaces whenever possible.

Although this feature may seem minor, it contributes to a more hygienic experience for many users.

Supports Better Accessibility Open-front toilet seats can also improve accessibility for individuals with certain mobility challenges or medical conditions.

The design provides additional room that may make personal hygiene easier for some users and can better accommodate various assistive techniques. While accessibility depends on many restroom features, the shape of the seat can be one small factor that improves usability.

Many public facilities aim to create restrooms that serve the widest possible range of people comfortably and safely.

For Complete Cooking STEPS Please Head On Over To Next Page Or Open button (>) and don’t forget to SHARE with your Facebook friends

The Most Parasite-Contaminated Vegetable? Experts

by

Fresh vegetables are an essential part of a healthy diet, but some are more likely than others to carry parasites if they are grown, harvested, or handled under unsanitary conditions. Among them, leafy greens—especially lettuce—are frequently identified as one of the vegetables most susceptible to parasite contamination. Why Lettuce Is at Higher Risk

Lettuce grows close to the ground, where it can come into contact with contaminated soil, irrigation water, or animal feces. Its large, crinkled leaves provide many places for microscopic parasites to cling, making them difficult to remove with a quick rinse.

Unlike vegetables that are usually cooked, lettuce is commonly eaten raw, meaning any parasites present may survive and be consumed. Common Parasites Found on Leafy Greens

Health experts have identified several parasites that can contaminate fresh vegetables, including:

You Must Give Up One

by

Imagine being given a strange challenge.

You have to give up one comfort forever.

Not until you change your mind.

And there is one more rule: you cannot choose “none of them,” and you cannot create a clever loophole that somehow lets you keep everything you love.

At first, the question sounds like a simple little game.

But once you start thinking about your options, it becomes surprisingly difficult.

Would you give up your morning coffee?

Watching television after a long day?

Ordering takeout when you don’t feel like cooking?

Suddenly, the choice doesn’t feel so simple.

That’s because these small comforts often become connected to our routines, memories, emotions, and everyday habits. A cup of coffee might represent the beginning of your morning. A favorite dessert might remind you of childhood. Sleeping late might be the one peaceful moment you get after a busy week.

So perhaps the most interesting part isn’t which comfort you give up.

It’s why you find certain comforts so difficult to lose.

Of course, this is a fun personality-style challenge, not a scientific personality test. One hypothetical decision cannot accurately define an entire person. Human personalities are far more complicated than that.

Still, your answer can make for an interesting conversation.

We all have little things that make ordinary days more enjoyable.

They don’t necessarily have to be expensive.

Sometimes the smallest comforts can have the greatest emotional value.

For one person, it might be a hot drink in the morning.

For another, it might be crawling into a warm bed after a long day.

Someone else might look forward to watching their favorite show every evening.

Another person might consider ordering their favorite meal after a stressful day one of life’s best conveniences.

These things may appear insignificant from the outside, but they can become important parts of our daily rhythm.

That’s why imagining life without one of them can feel surprisingly uncomfortable.

The real question isn’t simply:

“Which comfort has become most important to the way you live?”

Do you make your our

by

Kentucky Burgoo is a rich, slow-cooked stew that features a hearty blend of meats, vegetables, and bold spices. Originating from Kentucky, this traditional dish brings together chicken, beef, smoked sausage, and a medley of fresh vegetables simmered to perfection. Its complex flavors and comforting texture make it ideal for family dinners or special get-togethers.

This recipe serves 8 to 10 people, with a prep time of 20 minutes and a total cooking time of about 2 hours and 15 minutes. It’s perfect for those who enjoy a savory, filling stew that combines a variety of ingredients into one satisfying meal. Whether you’re new to Southern cuisine or looking to try a classic American stew, Kentucky Burgoo delivers an authentic taste experience.

Why you’ll love this Kentucky Burgoo recipe

This stew combines multiple meats for a complex, savory flavor that satisfies every palate. It features a mix of fresh vegetables and spices, creating a rich and hearty texture. The long simmering process tenderizes the meat and allows flavors to meld beautifully. Kentucky Burgoo is a crowd-pleaser, perfect for family meals or potlucks. The recipe is flexible with optional ingredients like lima beans or okra to suit your taste.

2 tablespoons vegetable oil 1 pound chicken thighs or breast, cut in chunks 1 pound beef chuck, cut in 1-inch cubes 8 ounces smoked sausage, sliced 1 large onion, diced 2 celery stalks, diced 1 green bell pepper, diced 3 cloves garlic, minced 1 tablespoon paprika 1 teaspoon black pepper 1 teaspoon dried thyme 1/2 teaspoon cayenne pepper 1 tablespoon Worcestershire sauce 1 (15-ounce) can tomato sauce 1 (14-ounce) can diced tomatoes 6 cups chicken or beef stock 2 cups corn kernels 2 cups diced potatoes 1 cup lima beans or okra (optional) 2 bay leaves 1 1/2 teaspoons kosher salt, or to taste This Kentucky Burgoo recipe calls for a variety of key ingredients that bring out its signature taste. Chicken thighs or breast provide tender, juicy meat, while beef chuck adds a rich, beefy depth. Smoked sausage contributes a smoky, savory note that balances the stew. Fresh vegetables like onion, celery, and bell pepper form a flavorful base, complemented by spices such as paprika and cayenne for warmth. Using good-quality stock and canned tomatoes ensures a hearty broth. When selecting meats, look for fresh, well-marbled cuts, and choose fresh vegetables for the best flavor.

Why You Should Cover Your

by

Getting ready for a vacation usually means packing clothes, arranging transportation, setting up pet care, and making sure the house is ready to sit empty for a few days. But there’s one small household task you may not have considered: covering your sink before you leave.

The advice sometimes appears in home-care tips and social media posts, often accompanied by claims that covering a sink can prevent unpleasant odors, keep pests away, or protect your plumbing while you’re gone.

So, is it actually worth doing?

Covering a sink can be useful in certain circumstances, but it’s not a universal requirement for every vacation. The more important steps are cleaning the sink, keeping the drain in good condition, checking for leaks, and taking precautions against water damage.

Here’s what covering your sink can—and cannot—do, along with the simple steps that can help you return to a fresher, safer home.

Why Do People Recommend Covering the Sink Before Leaving? A sink is connected to the home’s drainage system, and its drain can sometimes become a source of unpleasant smells. Covering the opening may seem like an easy way to keep unwanted odors or insects from coming through while the house is empty.

There are a few reasons people try this trick.

1. To Help Keep Unpleasant Odors Under Control One common reason for covering a sink is to prevent drain odors from drifting into the kitchen or bathroom.

Your sink’s plumbing usually includes a P-trap, the curved section of pipe beneath the drain that holds a small amount of water. This water creates a barrier that helps prevent sewer gases from entering your home.

When a house sits empty, the water in a trap can gradually evaporate, particularly in hot, dry conditions or during a longer absence. If the water seal disappears, unpleasant smells may enter the room.

Covering the drain opening might help limit odors coming directly from the drain, but it isn’t a reliable fix for a dry trap or a plumbing problem. If sewer smells are persistent, the underlying cause needs attention.

For a short vacation, a properly functioning, water-filled trap will usually provide the protection it’s designed to offer.

2. To Discourage Insects From Coming Through the Drain

Never step on this weed

by

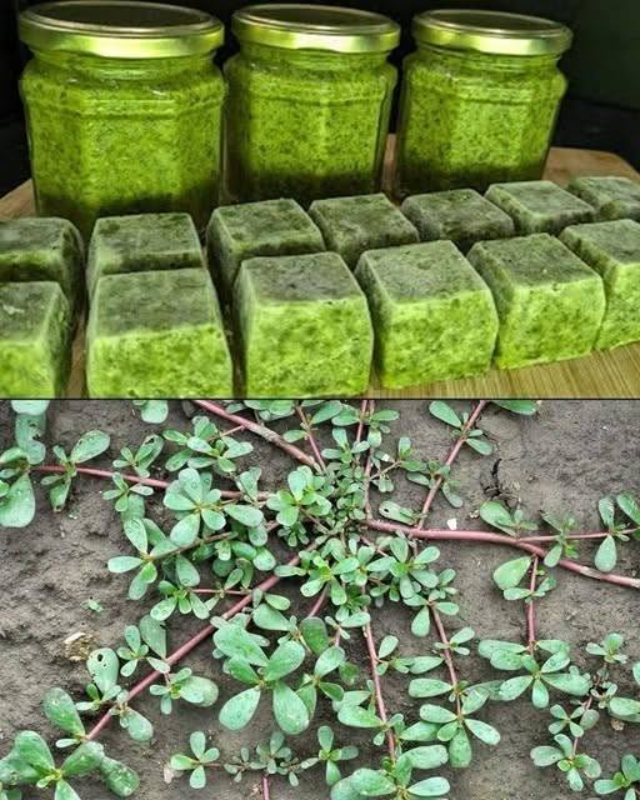
1. What Is Purslane? Purslane is a nutritious leafy green plant that is widely consumed in many parts of the world. Its scientific name is Portulaca oleracea. It grows naturally in warm climates and is recognised by its small, thick, succulent leaves and reddish stems. Purslane has been used for centuries in Mediterranean, Middle Eastern, Asian, and Turkish cuisine.

The plant grows close to the ground and spreads quickly. Its leaves are smooth, oval-shaped, and slightly glossy. Purslane has a fresh, mildly sour, and slightly salty taste, which makes it popular in salads, yoghurt dishes, soups, and cooked vegetable meals.

One of the most remarkable features of purslane is that it contains a relatively high amount of Omega-3 fatty acids compared to many other leafy vegetables. Because of this, it has gained popularity in modern healthy eating trends and is often considered a “superfood”.

2. Nutritional Value Purslane is low in calories but rich in essential nutrients. It contains vitamins, minerals, antioxidants, fibre, and healthy fatty acids.

For Complete Cooking STEPS Please Head On Over To Next Page Or Open button (>) and don’t forget to SHARE with your Facebook friends

Bleach stains on your clothes

by

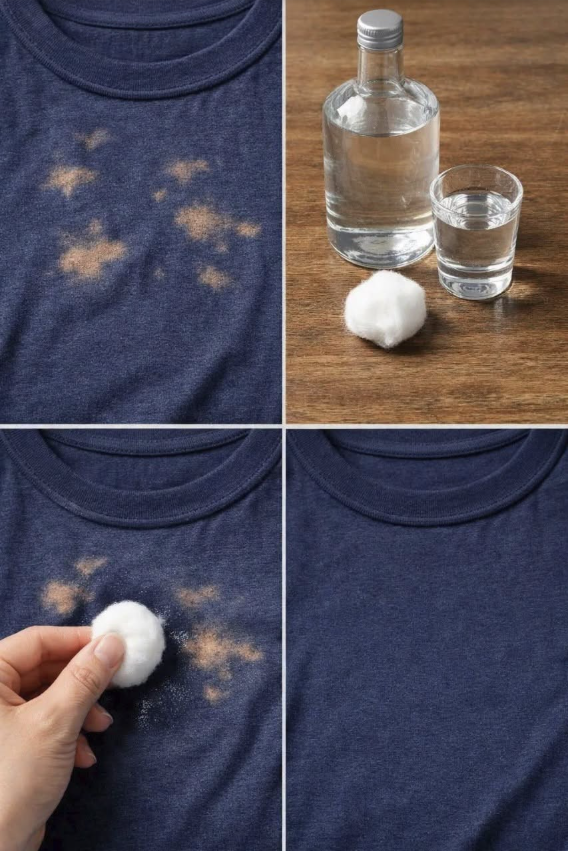
Subtitle: That accidental white splotch on your favorite black shirt doesn’t have to be the end of it. Here’s how to fix it—safely and effectively. Let me tell you about the time I ruined my favorite shirt.

It was a black linen blouse—perfect for summer, versatile, and expensive enough that I’d regretted buying it. I was cleaning the bathroom, wearing an old t-shirt, when I splashed a little bleach on my arm. I rinsed it off without thinking, grabbed a towel, and wiped my arm.

Then I realized I’d wiped my arm on the black linen blouse that was hanging on the back of the door.

One white splotch. Right on the front.

I stared at it for a full minute, hoping it would disappear. It didn’t. I considered throwing the shirt away. I considered wearing it anyway and pretending it was an intentional design choice.

Then I remembered something I’d read years ago: you can fix bleach stains. You don’t have to throw the garment away.

I did some research, gathered the supplies, and got to work. And it worked. The shirt was saved.

Today, I’m sharing that solution with you. Because everyone deserves a second chance—even your favorite black shirt.

The Science of Bleach Stains (Why They Happen) Before we get to the fix, let’s understand the problem.

Bleach removes color from fabric through a chemical process called oxidation. It breaks down the chemical bonds in the dyes and pigments that give fabric its color. The result is a permanent loss of color—a bleach stain.

The good news is that you can restore the color by dyeing the fabric. The bad news is that the stain is permanent unless you either cover it up or re-dye the entire garment.

But there’s a third option: you can use a fabric marker, dye pen, or careful application of fabric dye to spot-treat the stain.

Fabric marker or dye pen in the right color (or fabric paint)

Why You Should Never Put

by

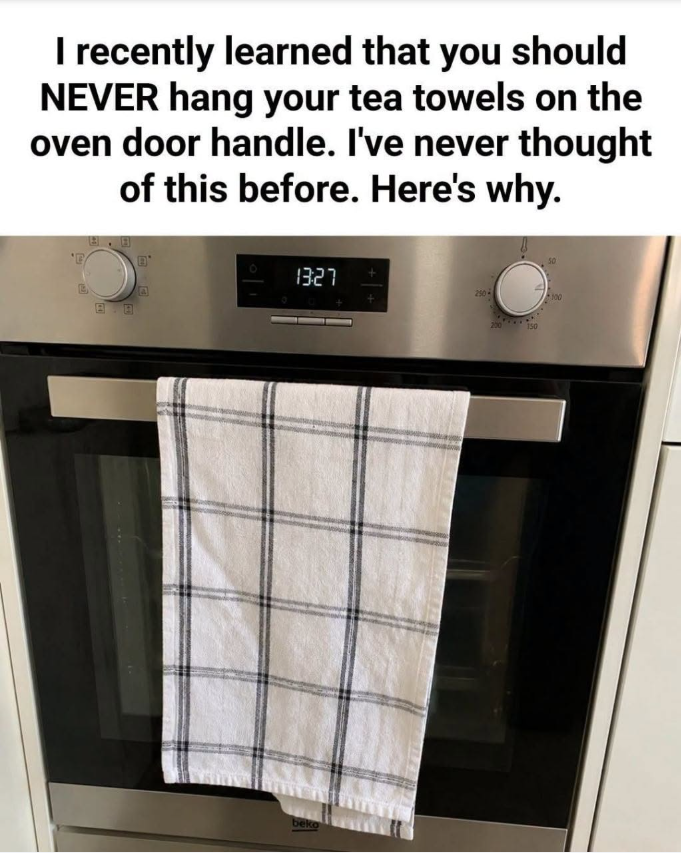
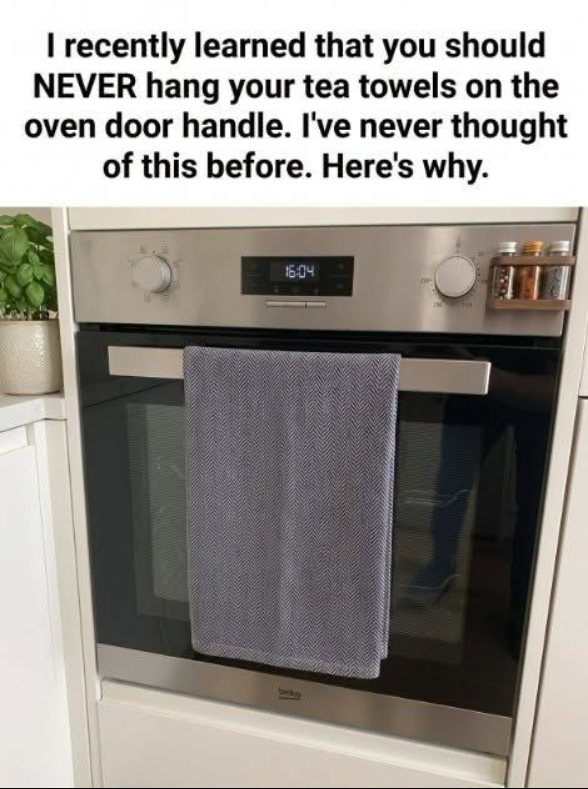
It always starts with good intentions, right? You’re in the middle of cooking—maybe the kitchen’s a mess, maybe the sauce is bubbling over—and without thinking, you toss your tea towel onto the oven door handle. It’s right there, after all. Easy to grab again when you need it.

My grandfather survived the hardest

by

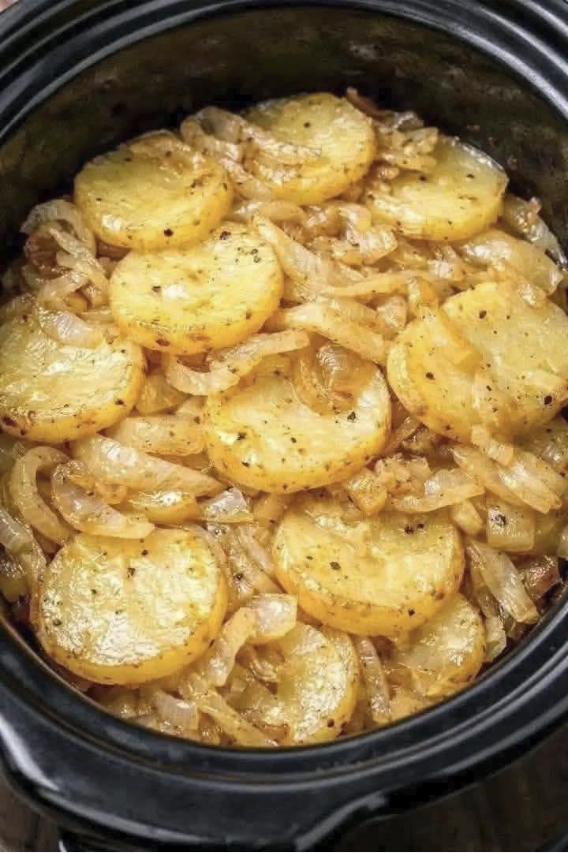
These Sliced Baked Potatoes are the ultimate side dish—golden, crispy edges with fluffy, buttery centers, all made with just 4 simple ingredients and one baking sheet. No boiling. No flipping halfway (if you don’t want to!). Just slice, season, and let the oven work its magic. Perfect alongside grilled meats, roasted chicken, or as a hearty base for toppings like sour cream, cheese, or chives.

🥔 Only 4 ingredients—pantry staples! ⏱️ 10 minutes prep, 30–35 minutes bake 💛 One baking sheet = easy cleanup 💸 Costs under $3—feeds 4 generously 🌾 Naturally nut-free, gluten-free, and vegan

(Serves 4) 2 lbs Yukon Gold or russet potatoes, scrubbed and sliced into ¼-inch rounds 2 tbsp olive oil (or melted butter) 1 tsp garlic powder 1 tsp onion powder Salt & black pepper to taste Optional: Fresh rosemary, paprika, or grated Parmesan 💡 Pro Tips:Soak slices in cold water 10 mins—removes excess starch for crispier edges.Pat potatoes VERY dry before oiling—water is the enemy of crispness!Use a wire rack on the baking sheet—ensures air circulation for all-over crunch (optional but recommended).

How to clean your air

by

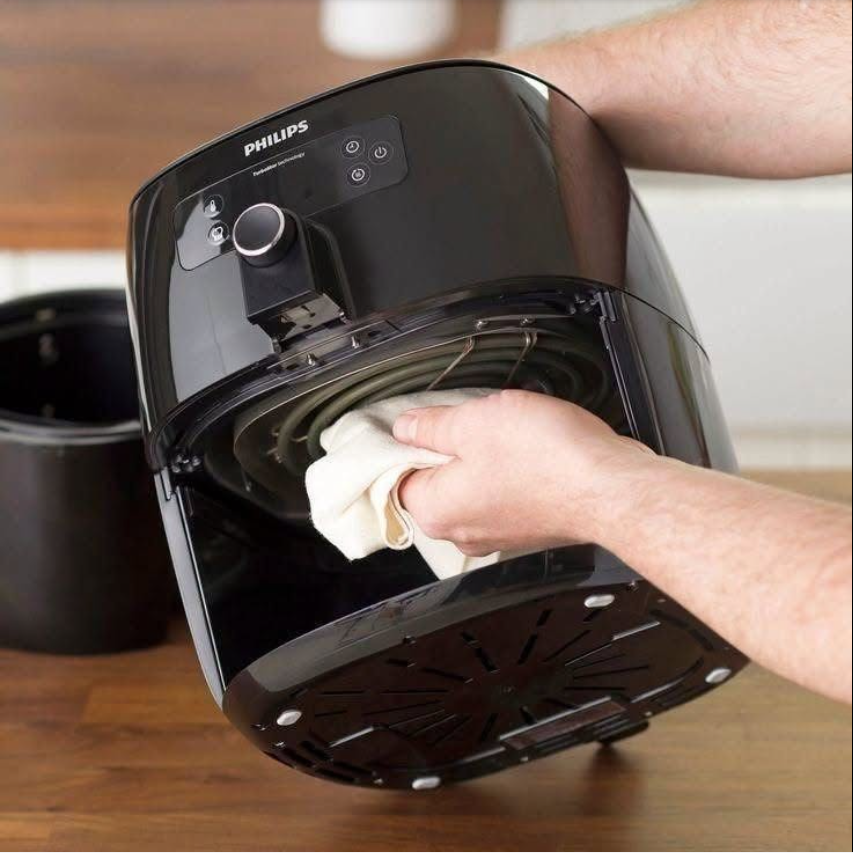
An air fryer makes cooking quick and convenient, but regular cleaning is essential if you want your food to taste fresh and your appliance to continue working properly. Grease, crumbs, and food residue can build up inside the basket, drawer, and heating area after repeated use.

The good news is that cleaning an air fryer doesn’t have to be difficult. With a few simple steps, you can keep it looking clean and smelling fresh without damaging the appliance.

1. Unplug the Air Fryer and Let It Cool Before cleaning your air fryer, unplug it from the electrical outlet and allow it to cool completely.

Never attempt to clean the appliance while it is still hot. Hot surfaces can cause burns, and adding water to a hot appliance can create problems.

Once it has cooled, place it on a stable surface where you have enough room to remove the basket and drawer.

2. Remove the Basket and Drawer Take out the removable basket, tray, or drawer.

Shake loose crumbs into the trash and remove any pieces of food that may have become stuck to the bottom or sides.

If there is a significant amount of grease, wipe away the excess with a paper towel before washing. This can help prevent grease from going down the kitchen drain.

For Complete Cooking STEPS Please Head On Over To Next Page Or Open button (>) and don’t forget to SHARE with your Facebook friends

Marouane Majouri

by

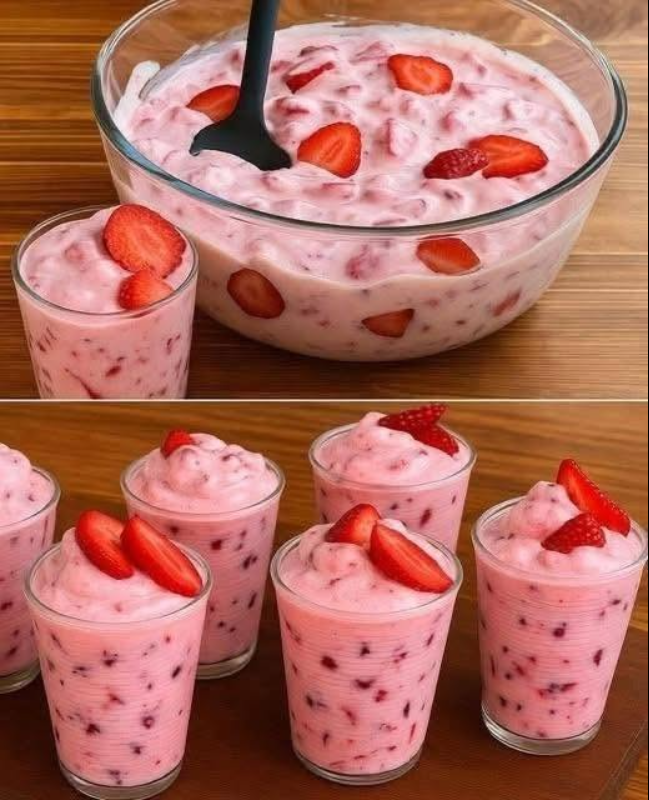
The Perfect Last-Minute Sweet Treat Imagine a dessert that’s elegant, refreshing, and ready faster than you can decide what to watch on TV. This effortless strawberry delight proves you don’t need hours in the kitchen to create something special. Whether you’re craving a sweet ending to a weeknight dinner or need to impress unexpected guests, this recipe is your secret weapon.

With just a few simple ingredients and barely any effort, you can transform fresh strawberries into a beautiful, restaurant-style dessert. The best part? You likely already have everything you need waiting in your kitchen.

Why This 2-Minute Dessert Works SPEED & SIMPLICITY: No cooking, no complicated steps

FRESH FLAVORS: Highlights the natural sweetness of strawberries

MINIMAL INGREDIENTS: Just 3-4 components create magic

HEALTHY INDULGENCE: Naturally sweetened and packed with vitamins

What does your sleeping position

by

Maybe you curl up tightly on your side, stretch out across the entire bed, sleep flat on your back, or bury your face into the pillow.

You might even change positions throughout the night without realizing it.

People have long been fascinated by the idea that the way we sleep can reveal something about our personality. Some popular theories claim that certain positions are associated with confidence, sensitivity, independence, or even laziness.

But there is an important distinction between sleeping-position folklore and scientific evidence.

There is no reliable scientific test that can determine whether someone is lazy, confident, shy, or outgoing simply by looking at how they sleep. Your preferred position is influenced by comfort, habits, body structure, pain, temperature, mattress quality, pregnancy, breathing patterns, and many other factors.

Still, different sleeping positions can be interesting to explore—and some may provide clues about your comfort preferences, sleep habits, and physical health.

So tonight, before you drift off, take a moment to notice how you’re lying there.

You might learn something interesting about your sleep after all!!

Most of us don’t consciously choose a sleeping position every night.

We simply settle into whatever feels comfortable.

Over time, however, the body can develop familiar sleep habits. You may automatically roll onto your side as soon as your head hits the pillow or instinctively stretch your legs out when you’re ready to relax.

Your preferred position can also change.

An old mattress, a sore shoulder, pregnancy, an injury, changes in body weight, room temperature, or even a new pillow can make a once-comfortable position suddenly feel wrong.

And there’s another fascinating detail: the position you fall asleep in isn’t necessarily the position you spend the whole night in.

So when we’re talking about “your sleeping position,” we’re really talking about a preference rather than a fixed posture.

Side sleeping is extremely common.

You may sleep with your knees slightly bent, your legs stretched out, or curled into a tighter position.

Some people hug a pillow while sleeping on their side, while others tuck their arms underneath the pillow.

Traditional sleep-position folklore sometimes describes side sleepers as thoughtful, sensitive, dependable, or somewhat guarded.

People who sleep curled up tightly are sometimes portrayed as cautious or emotionally protective.

But again, these are personality interpretations—not scientifically established facts.

Your brain isn’t secretly announcing your personality through the way your knees are positioned!!

Side sleeping can be comfortable for many people and may be particularly useful for people who find back sleeping uncomfortable.

For some people, sleeping on the side can also make breathing easier than lying flat on the back.

If you frequently wake with shoulder, hip, or neck discomfort, however, your pillow height and mattress support may be worth examining.

This is one of the most recognizable sleeping positions.

You lie on your side and draw your knees toward your chest, sometimes wrapping your arms around a pillow.

Popular interpretations often associate the fetal position with people who are sensitive, cautious, or comfort-seeking.

Some versions of the theory even claim that people who curl up tightly are hiding from stress.

But there’s no reliable evidence that your sleeping posture can tell us whether you’re emotionally guarded or sensitive.

Sometimes a person simply finds curling up comfortable!!

If you sleep curled tightly, try not to pull your knees all the way toward your chest for the entire night if it leaves your back feeling stiff.

A pillow between the knees may provide additional comfort and help support a more neutral hip and spine position.

Back sleepers lie face-up with the head supported by a pillow and the arms either beside the body, across the stomach, or above the head.

Back sleepers are sometimes described as confident, independent, organized, or comfortable being the center of attention.

But there’s no scientific personality test hiding underneath your pillow.

Someone can be outgoing and sleep on their side.

Someone can be shy and sleep on their back.

And someone can change positions five times before breakfast!!

Back sleeping can feel comfortable for some people because it allows the body to rest in a relatively symmetrical position.

However, sleeping flat on the back can worsen snoring or symptoms of obstructive sleep apnea in some people.

If you regularly snore loudly, wake gasping or choking, experience witnessed pauses in breathing, or feel excessively sleepy during the day, it’s worth discussing those symptoms with a healthcare professional.

Stomach sleeping means lying face-down, usually with the head turned to one side.

Some people absolutely love it.

Others can’t imagine sleeping that way for even five minutes!!

Popular sleep-position articles sometimes describe stomach sleepers as bold, stubborn, impulsive, or outgoing.

But once again, those labels aren’t scientifically reliable.

Your favorite position isn’t a personality test.

There is a practical reason some stomach sleepers wake up feeling stiff.

Because your head usually has to turn to one side so you can breathe, your neck may remain rotated for a long period.

If you regularly wake with neck or back discomfort, experimenting with a different position or pillow arrangement may help.

The Hidden Kitchen Hazard: Why

by

The Hidden Kitchen Hazard: Why That Tea Towel on the Oven Door Is a Recipe for Disaster

How Do You Like Your

by

Steak lovers know that the perfect steak isn’t just about the cut—it’s all about how it’s cooked. From a cool, red center to a fully cooked bite, everyone has their own favorite level of doneness.

Take a look at the five steaks in the image and ask yourself:

🥩 1. Rare A rare steak is seared on the outside while the center remains cool and bright red.

Internal Temperature: 120–125°F (49–52°C)

Tender cuts like filet mignon Those who enjoy a very soft, juicy texture 🥩 2. Medium Rare Often considered the sweet spot by many chefs, medium-rare steak has a warm, red center with excellent tenderness and flavor.

For Complete Cooking STEPS Please Head On Over To Next Page Or Open button (>) and don’t forget to SHARE with your Facebook friends

What does your sleeping position

by

Maybe you curl up tightly on your side, stretch out across the entire bed, sleep flat on your back, or bury your face into the pillow.

You might even change positions throughout the night without realizing it.

People have long been fascinated by the idea that the way we sleep can reveal something about our personality. Some popular theories claim that certain positions are associated with confidence, sensitivity, independence, or even laziness.

But there is an important distinction between sleeping-position folklore and scientific evidence.

There is no reliable scientific test that can determine whether someone is lazy, confident, shy, or outgoing simply by looking at how they sleep. Your preferred position is influenced by comfort, habits, body structure, pain, temperature, mattress quality, pregnancy, breathing patterns, and many other factors.

Still, different sleeping positions can be interesting to explore—and some may provide clues about your comfort preferences, sleep habits, and physical health.

So tonight, before you drift off, take a moment to notice how you’re lying there.

You might learn something interesting about your sleep after all!!

Most of us don’t consciously choose a sleeping position every night.

We simply settle into whatever feels comfortable.

Over time, however, the body can develop familiar sleep habits. You may automatically roll onto your side as soon as your head hits the pillow or instinctively stretch your legs out when you’re ready to relax.

Your preferred position can also change.

An old mattress, a sore shoulder, pregnancy, an injury, changes in body weight, room temperature, or even a new pillow can make a once-comfortable position suddenly feel wrong.

And there’s another fascinating detail: the position you fall asleep in isn’t necessarily the position you spend the whole night in.

So when we’re talking about “your sleeping position,” we’re really talking about a preference rather than a fixed posture.

Side sleeping is extremely common.

You may sleep with your knees slightly bent, your legs stretched out, or curled into a tighter position.

Some people hug a pillow while sleeping on their side, while others tuck their arms underneath the pillow.

Traditional sleep-position folklore sometimes describes side sleepers as thoughtful, sensitive, dependable, or somewhat guarded.

People who sleep curled up tightly are sometimes portrayed as cautious or emotionally protective.

But again, these are personality interpretations—not scientifically established facts.

Your brain isn’t secretly announcing your personality through the way your knees are positioned!!

Side sleeping can be comfortable for many people and may be particularly useful for people who find back sleeping uncomfortable.

For some people, sleeping on the side can also make breathing easier than lying flat on the back.

If you frequently wake with shoulder, hip, or neck discomfort, however, your pillow height and mattress support may be worth examining.

This is one of the most recognizable sleeping positions.

You lie on your side and draw your knees toward your chest, sometimes wrapping your arms around a pillow.

Popular interpretations often associate the fetal position with people who are sensitive, cautious, or comfort-seeking.

Some versions of the theory even claim that people who curl up tightly are hiding from stress.

But there’s no reliable evidence that your sleeping posture can tell us whether you’re emotionally guarded or sensitive.

Sometimes a person simply finds curling up comfortable!!

If you sleep curled tightly, try not to pull your knees all the way toward your chest for the entire night if it leaves your back feeling stiff.

A pillow between the knees may provide additional comfort and help support a more neutral hip and spine position.

Back sleepers lie face-up with the head supported by a pillow and the arms either beside the body, across the stomach, or above the head.

Back sleepers are sometimes described as confident, independent, organized, or comfortable being the center of attention.

But there’s no scientific personality test hiding underneath your pillow.

Someone can be outgoing and sleep on their side.

Someone can be shy and sleep on their back.

And someone can change positions five times before breakfast!!

Back sleeping can feel comfortable for some people because it allows the body to rest in a relatively symmetrical position.

However, sleeping flat on the back can worsen snoring or symptoms of obstructive sleep apnea in some people.

If you regularly snore loudly, wake gasping or choking, experience witnessed pauses in breathing, or feel excessively sleepy during the day, it’s worth discussing those symptoms with a healthcare professional.

Stomach sleeping means lying face-down, usually with the head turned to one side.

Some people absolutely love it.

Others can’t imagine sleeping that way for even five minutes!!

Popular sleep-position articles sometimes describe stomach sleepers as bold, stubborn, impulsive, or outgoing.

But once again, those labels aren’t scientifically reliable.

Your favorite position isn’t a personality test.

There is a practical reason some stomach sleepers wake up feeling stiff.

Because your head usually has to turn to one side so you can breathe, your neck may remain rotated for a long period.

If you regularly wake with neck or back discomfort, experimenting with a different position or pillow arrangement may help.

Marouane Majouri

by

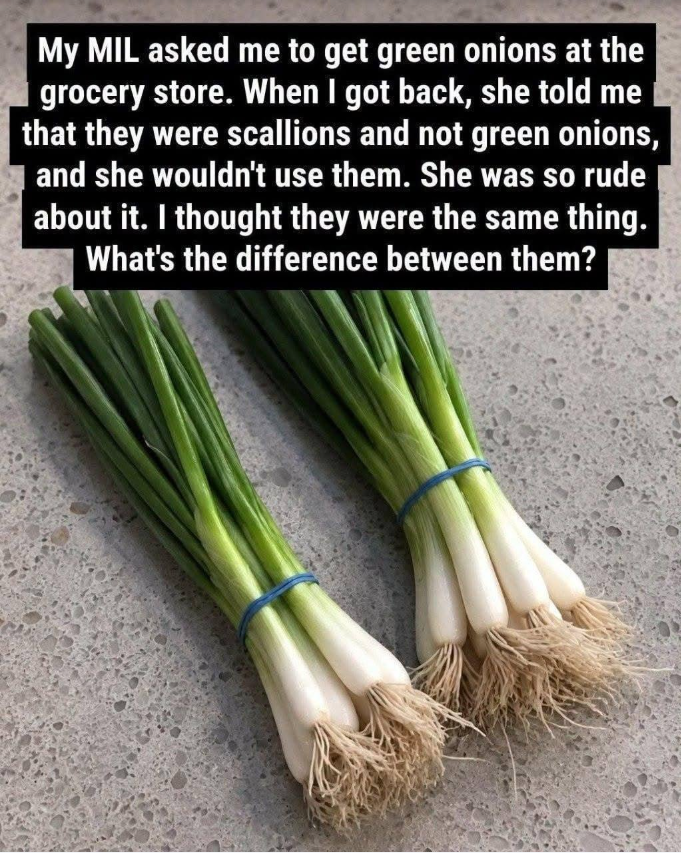
When it comes to cooking, the humble onion plays a crucial role in enhancing flavors and adding depth to a wide array of dishes. But if you’ve ever stood in the produce aisle staring at a bundle of long green stalks, wondering if the recipe meant “scallions” or “green onions” or “spring onions,” you are not alone. These terms are often used interchangeably, causing endless confusion among home cooks. While these varieties share a similar family tree and a beautiful, crisp freshness, there are distinct differences that set them apart. Understanding these subtle nuances can elevate your everyday cooking from a simple meal to a comforting, flavorful experience. Let’s explore the dissimilarities between scallions, green onions, spring onions, and chives, and discover how to use each one to bring out the best in your favorite family recipes.

Flora & Fauna Let’s start with the slender, vibrant stalks that look like little green flags of spring. Scallions are young onions harvested very early, long before a bulb has a chance to form at the base. Because of this, the white part of the scallion is slim and uniform, matching the width of the green tops. They have a mild, sweet, and crisp onion-like taste without the sharp bite of a mature onion. Scallions are incredibly versatile and are commonly used in both raw and cooked dishes. They add a fresh, bright crunch to salads, stir-fries, soups, and omelets. Usually, you’ll slice them diagonally, using every bit of both the white and green parts.

🧅 What Are Green Onions? If you’re standing in the grocery store wondering if green onions and scallions are the exact same thing, the answer is: usually, yes! In most supermarkets, the terms “scallions” and “green onions” are used completely interchangeably to describe the exact same vegetable. However, in some regions or at farmers’ markets, “green onion” might refer to a slightly more mature scallion. These might have a very tiny, slightly wider white base and a marginally stronger, more pungent flavor. They are a staple in Asian cuisines, particularly in Chinese and Korean dishes, where they are tossed into sizzling stir-fries, folded into dumplings, or sprinkled generously over comforting bowls of noodle soup.

Kitchen tools set 🧅 What Are Spring Onions?

I will stop posting maybe

by

Pineapple Lemonade is an easy and delicious drink for spring and summer. A fun twist on classic summer lemonade for all of your parties, baby showers, and fun get-togethers. The perfect party punch for kids and adults!

I have been making this pineapple lemonade for years, and it’s always a hit. So simple and perfect for last-minute gatherings.

We are officially kicking off summer this week. No more school! We survived seventh grade! Wahoo. I know it’s earlier than most, but we start back to school the first week of August, and I’m never ready for that.

Now it’s time for cookouts and swimming pool time. We had our first cookout of the season on Friday. It was our typical impromptu get-together but so much fun.

My husband and kids made me an awesome bar-height table for the deck for Mother’s Day. It is the perfect addition to our deck and pool area. It’s so dang cool, I will have to get some pictures to share.

The top is made from two huge cedar slabs from a tree that they cut down on the ranch while clearing brush. My guys are so talented.

While we were getting the grill ready, we had chips, guacamole, and my Aunt Carolyn’s homemade salsa that my mom was sweet enough to share. I will have to see if I can share that recipe with y’all; it is seriously the best ever.

I made a batch of this Pineapple Lemonade, and it was the perfect drink with the chips and salsa.

This Pineapple Lemonade is not only refreshing but also incredibly easy to make. It’s the perfect combination of sweet and tangy, making it a delightful drink for any occasion. Plus, it’s a hit with both kids and adults, so you’ll never have to worry about making separate drinks for your gatherings.

For a friend...what is this

by

If you’ve been browsing antique shops, estate sales, or historical museums and stumbled upon a peculiar, pie-shaped wooden table topped with a massive, multi-sided rolling pin, you aren’t looking at an odd piece of living room furniture. You have unearthed a fascinating piece of culinary history: a traditional Southern Biscuit Brake (sometimes called a biscuit table or beaten biscuit machine).

Long before the invention of modern chemical leaveners like commercial baking powder, baking soda, or electric stand mixers, baking light, airy biscuits required an immense amount of physical labor. The biscuit brake was the ultimate 19th-century labor-saving kitchen appliance, engineered specifically to tackle the grueling task of making traditional “beaten biscuits.”

For Complete Cooking STEPS Please Head On Over To Next Page Or Open button (>) and don’t forget to SHARE with your Facebook friends

My mother-in law was laughing

by

It was one of those small, ordinary moments that somehow turns into a quiet lesson. My mother-in-law was in the kitchen with a friend, chatting and laughing over spices while preparing a meal. At one point, her friend asked, quite innocently, what paprika is actually made of. My mother-in-law burst into laughter, clearly surprised that someone wouldn’t know something she considered so basic.

I smiled along, but inside I felt a flicker of embarrassment—because I didn’t know either.

Paprika is such a common ingredient. It sits in spice racks all over the world, adding color and flavor to everything from stews to roasted vegetables. Yet, like many everyday things, it’s easy to overlook where it actually comes from.

Please Head On keep on Reading (>)

For Complete Cooking STEPS Please Head On Over To Next Page Or Open button (>) and don’t forget to SHARE with your Facebook friends

Marouane Majouri

by

The cabinet above the refrigerator is one of the most underused storage spaces in many kitchens. Because it sits higher than most cabinets, it often becomes a catch-all for random items that are rarely used. With a bit of planning and organization, however, this overlooked space can become a highly functional part of your kitchen.

A smart approach is to use this cabinet for items you don’t need every day. Small kitchen appliances—such as blenders, food processors, stand mixers, waffle makers, or slow cookers—can be stored there when not in regular use. Baking supplies, specialty cookware, roasting pans, cooling racks, cutting boards, and extra mixing bowls are also ideal choices. Moving these bulkier items out of your main cabinets frees up valuable space for everyday essentials like dishes, glasses, and cooking tools.

Organization is the key to making this area practical. Instead of stacking items randomly, use storage bins, baskets, or labeled containers to group similar things together. For example, keep baking tools in one bin and seasonal kitchen items in another. Clear containers are especially useful, as they allow you to quickly see what’s inside without pulling everything out.

To make the most of the vertical space, consider adding shelf risers or adjustable organizers. These simple additions can double your storage capacity while keeping everything visible and easy to access. A well-organized cabinet saves time and reduces frustration when you need to find something quickly.

How many eggs can you

by

Visual puzzles and counting challenges have become extremely popular online because they test more than just your eyesight—they test your attention, patience, and ability to notice hidden details. One of the latest viral challenges asks a simple question: how many eggs can you see in the picture?

At first glance, the answer might seem obvious. Most people quickly scan the image and give a number within seconds. But as with many optical illusions and hidden-object puzzles, the real challenge is that not everything is immediately visible. Some eggs may be cleverly hidden, blended into the background, or partially covered, making the task trickier than expected.

These types of puzzles are not only fun but also a great way to train your brain to slow down and observe carefully.

WHY THIS EGG COUNTING PUZZLE IS TRICKY 1. Your brain fills in gaps automatically The human brain is designed to recognize familiar shapes quickly. When you see eggs, your brain may automatically “assume” a number instead of carefully counting each one.

2. Some objects are partially hidden In many visual puzzles, items may overlap, blend into shadows, or be placed in corners that are easy to miss.

3. Distractions in the image Background patterns, colors, or other objects can distract your attention and cause you to skip over hidden eggs.

4. Speed vs accuracy Most people try to answer quickly, but rushing often leads to mistakes.

BENEFITS OF SOLVING VISUAL COUNTING PUZZLES 1. Improves focus These challenges train your mind to pay closer attention to small details.

2. Strengthens observation skills You become better at noticing hidden or subtle differences in images.

3. Boosts mental sharpness Regular brain teasers can help keep your thinking active and engaged.

4. Provides quick entertainment They are simple, fun, and can be enjoyed anytime without preparation.

COMMON MISTAKES PEOPLE MAKE 1. Counting too quickly Many people give an answer within seconds without carefully checking every part of the image.

2. Ignoring corners and edges Hidden objects are often placed in less obvious areas.

3. Assuming symmetry People often expect patterns to be balanced, which can lead to missed items.

4. Overlooking partial shapes Some eggs may not be fully visible but still count as part of the puzzle.

For Complete Cooking STEPS Please Head On Over To Next Page Or Open button (>) and don’t forget to SHARE with your Facebook friends